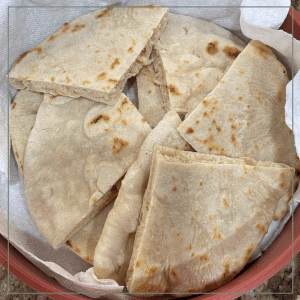
Sada Roti
Sada roti, a staple in Trini cuisine, is a leavened flatbread that is loved for its soft and versatile nature. It is similar to a pita bread and often cooked on an open flame. Here's my mom's classic sada roti recipe.
Equipment
- 1 Belna (Rolling Pin)
- 1 Tawa (Griddle)
- 1 Chowki (Surface for rolling)
- 1 Large mixing bowl
- 1 Tea towel
- 1 Wet paper towel
Ingredients
- 1 cup Self-rising flour (Gold Medal brand) (and some for dusting)
- ¼ tsp salt (or just a pinch!)
- 1 cup water (might not use all)
- 1 tbsp Oil (Crisco brand) (to tap on)
Instructions
Step 1: Preparing the Dough
- To begin, gather the basic ingredients for sada roti - flour, water, oil, and salt. (You could use substitute about 1/2 cup of flour for whole wheat flour but do not use only all whole wheat). Mix these dry ingredients together using your hand in a mixing bow.
- Then, gradually add water. When a large clump (about the size of your fist) forms, set it aside and make another one with some water. Set aside the dough that is stuck to one side while you work to form the same consistency with the dry flour portions.
- Once the water and the flour have formed one big ball of dough, you can add more flour if it is too sticky. You do not want it all to stick to the palm of your hands.
- Then you can start kneading the dough. You want to do this for about five minutes by continuously folding it and pushing it with your palm.
- Keep kneading until a smooth and soft dough forms. Then add the oil to both sides and push in with your knuckles.
Step 2: Resting the Dough
- Once the dough reaches the desired consistency, cover it with a wet paper towel and then tea towel. Allow it to rest for 30 minutes.
- After this, divide it into equal pieces and shape them into round balls.
- Cover the dough balls with a damp cloth or plastic wrap, and let them rest for a minimum of 10 minutes.
- This resting period allows the gluten to relax, making the dough easier to roll out later.
Step 3: Roll Dough and Cook Roti
- Now comes the exciting part - rolling and cooking the roti. Start with a floured surface and dust your rolling pin with dry flour to prevent sticking. Take one of the dough balls and place it on the floured surface. Use the rolling pin to gently roll the dough into round flat disks. The size will depend on your preference for thickness and the size of your tawa.
- While you are rolling the dough, heat a dry cast-iron skillet or tawa over medium heat. Once the skillet is hot, carefully place the rolled roti onto it. Cook the roti for about 1 minute until you see lots of small bubbles. Flip it over and cook the other side in the same way.
- The roti could puff up and have a slightly crispy texture. If your roti does not swell, you can "sakay" the roti by pulling back the tawa and inching the roti directly towards the heat and rotating it. You could also put the roti in the microwave for about 30 seconds.
- Repeat this process for each dough ball, rolling and cooking them one by one.